Thursday, June 15, 2017

Git for Beginners - Part 7 - Git Merging and Merge Conflicts


In this tutorial, I will cover about Git Merging and Merge Conflicts. In the last tutorial, we learnt about Git branching. Basically, Git merging is the opposite of Git branching, but it has additional features.

Merging combines the changes from both to form the current branch. And also it gathers all the commits you have done for particular branches. You can keep working on merged branches if are not deleted. Because when you merge some branch, it is not deleted.

      Let's consider the merging of two branches, in this case, MyBranch will be merged to the master branch.


you will notice that the file1 is changed because of the merge. When you check the file1 the phrase,  'changed the file1 on MyBranch' can be seen in the master branch although I have done it in MyBranch.


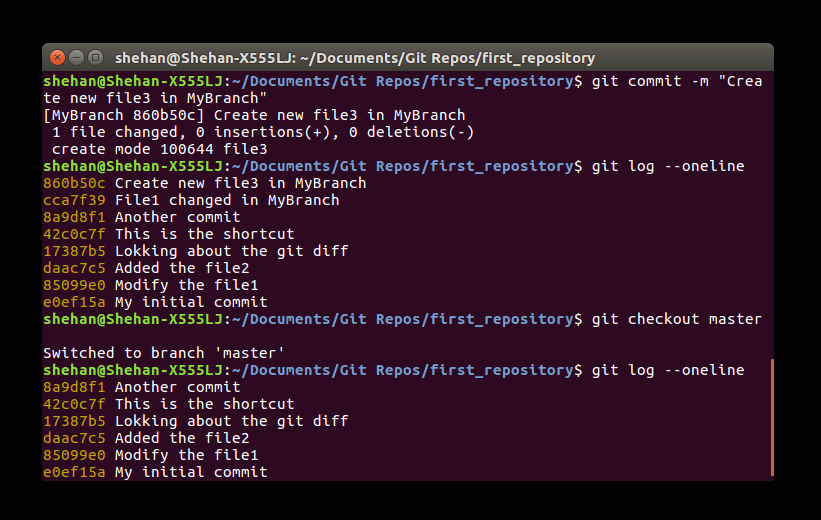
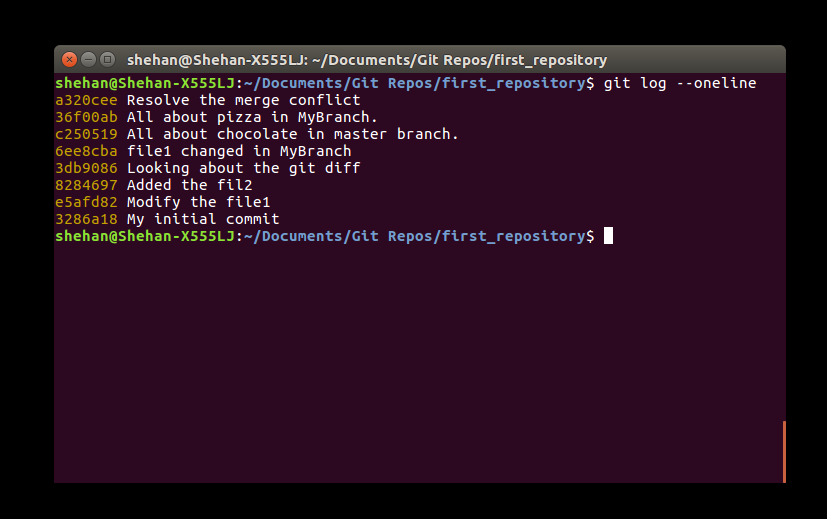
If you check your Git log, all of the commits, done in both the MyBranch and the master branch are now can be seen. Because the commits are also have been merged. 

Merge Conflict:

        Above we have focused on Git Merging and will look in deeper about Merge Conflicts. Generally, merge conflicts happen when you changes the same line or the same area of a file. Most of the Version Control Systems provide the option of merging and leave the responsibility of resolving merge conflicts to the user. Most of the times Git tries to resolve merge conflicts. But it may ask you to resolve the issue when it cannot determine which bunch of code to choose. 

Once there is a merge conflict, you must resolve it manually. Otherwise, you cannot switch to another branch.

Let's consider an example. In this case, I will change the file2 which leads to a merge conflict.

In master branch, 


In MyBranch,


Once you have changed the same file on different branches, remember to commit changes for both branches.

Now try to merge the file on the master branch. But you will notice that auto merging is failed by noticing the merge conflict. The reason is Git cannot resolve what is right in that line. Go ahead and check your file, in this case, file2.


What you can observe is there are <<<<<<<, >>>>>>> and ======= markers. These are called conflict markers. These markers are created by Git. The <<<<<<< and >>>>>>>> signs indicate the conflicted area in yuor code and ======= sign separate the two versions. The HEAD means the latest commit. The bottum version is the other branch.

This is your time to what is correct and what is wrong. Go ahead and remove the unwanted parts of your code and resolve the problem. 

In this case, both chocolate and pizza are awesome ;-). Therefore I will keep both of them. 


When you check the Git log, you will notice that all commits that you have done are sitting here.


This is somewhat difficult to do it. But now you are ensured by yourself that the final source code is pretty accurate. Once you resolve the merge conflict, go ahead and switch to your branch, in this case, to the MyBranch. (Now you can switch to any branch). You will notice that nothing is changed in file2. Therefore you can continue work on with branch independently.


Wednesday, June 14, 2017

Git for Beginners - Part 6 - Git Branching


In this tutorial, we will focus on Git branching. In one of my previous tutorial, I have said that our default working directory works on the master branch.


Branching is an awesome feature of Version Control System. Consider when you work with a project and if you will face some issues, it is quite easy to fix issues by using Git branches. Another example is when you work on a project and it is going great, but you add a new feature to your project. You don't really want to mess with your current code. What you can do is create a new branch and add the new feature without messing the main source code. 


Branching means, you separate from main line (master branch) of development and continue to do work without disturbing that main line. Most of the Version Control System has branching support. 
You can work with the main line and any number of branches simultaneously. If you have some issue in your project and you don't need to interfere with your project, create a new branch and fix the issue, then add (merge) the fixed issue to your master branch.

Creating a new branch:

        To create a new branch using the $ git branch <branch name> command.


Now you have created a new branch. But you are still in the master branch. Type $ git branch command. 


The ' * ' sign implies the branch you are on. Go ahead and type $ git checkout <branch name>. 


Now you are on your new branch. Let's create a new file (file3) and commit it. After you have successfully committed it check the Git log. You will notice that your latest commit is there.


Let's got the master branch and check the Git log. You will notice that your latest commit is disappeared.


The reason is that commit belongs to your new branch. But when you switch to the master branch it will not appear to you. But the commit is still there.

Let's try another example about branching. First, switch to the new branch and change the content of some file.


Then commit it. When you have committed successfully committed it, switch to the master branch. But the modification of your file is disappeared. This case is also same as the above scenario.

Delete a branch:

        If you want to delete a branch, use $ git branch -D <branch name>. But think twice before you delete a branch. Before you delete the branch you want, switch to the master branch. Because you cannot delete the branch which you are currently on.


If you want to create a branch and switch to it in one command, use $ git branch -b <branch name>. 


Tuesday, June 13, 2017

Git for Beginners - Part 5 - Git Special Commands


In this tutorial, I will show you special commands in Git. These commands will help you to use Git in very efficient way.

1. Git diff:   

       If you add some file to the staging area and then you change the content of the file, you can notice that $ git status will say that your file has been modified. The difference of current status of the file and status of the staging area is tracked by this $ git diff command. 

As an example, I have changed the content of the file1. 


Here I have added '!' for the second line and 'find the difference' statement. 

1. I haven't changed the first line. Therefore it appears in white color.
2. In second line I added '!'. Therefore it shows the difference between the current status of the file1        (in green color) and the status of the file1 (in red color) in the staging area.
3. I have added a new third line. Therefore it shows in green color.

Note: Remember when you stage files with "git add" you are duplicating files. That is why you can get the difference of current working file with the same staging area file.  

Once you add the file1 and see the $ git diff, you cannot see any difference. 

2. Git diff --cached:

   
        When you modify some file and add this to the staging area, this will show you the difference between previous state and the current state of the file.

For an example, I will use the same above example.  


You will see the same differences which are mentioned earlier. 

3. Git log:

        
         $ git log will show you a log of all your commits in your repository. This command shows the most recent commits first. You can scroll down and see the first commit as well. 


When "git log" is too long to fit on the screen, it will throw you into a command line editor. To exit the editor, hold Shift + zz. Otherwise, you will be stuck in there. 

4. Git log --oneline:

         This command will give you all commits in your repository as messages in very small space. 

5. Git commit -a -m "msg":

         If you add a new file or modify some file, you cannot commit them directly. So first you need to add these files, then commit them. Using this command we can commit quickly without adding the files.


6. Git status -s:

          This tells you what has been modified in your repository in shorthand. Basically, this will save the screen space of your terminal.


7. Remove the latest commit:

         $ git reset --hard will delete your working directory changes. Make sure that you keep your local changes secretly before running this command. 
Assume you are sitting on that commit, use $ git reset --hard HEAD~1 to remove it.  

8. Git reflog show:

        This command will show all the information  such as commits, checkouts, merging etc. 


Monday, June 12, 2017

Git for Beginners - Part 4 - More about Git Commit


So far we have covered how to work with $ git add and $ git commit commands.

$ git status is the command that will tell you
                                          - what branch you are on
                                          - what files you have changed
                                          - what files are not tracked
                                          - hint on what you do next


You can see that it shows you are now on the master branch. Normally it is the default branch. I will explain in a further lesson about what is a branching, merging and forking. Your project is called the working directory when you initial Git to version control your code. You can consider it as the repository'Working directory clean' statement tells you that there are no tracked and modified files.

Now we will modify the file1 and check what the $ git status command tells us.


Here git status command tracked the modified files in your repository. That is why it mark in red. So it means that Git is tracking your files and check whether there are any modifications of your files. And it says what you can do next (no changes added to commit (use "git add " and/or "git commit" -a)). 

Go ahead and make a new file to check what the $ git status command says.


The reason why because we are not adding this new file to Repository yet. We have only told to Git to be tracked this file. Simply using the $ git add . command or $ git add file2 you can add any untracked files to your Git repository.


Now you will notice that both
                                        modified: file1
                                        new file: file2 
are added to the staging area by Git. You can decide it by their green colour.

If you want to remove your files from your repository use $ git rm --cached <filename> command. Because we still don't commit them. Modified and new files are still in the staging area.


Once you check the Git status, you can see that the file2 is untracked again. Then type $ git commit and keep a message of what you have done so far.


This tells you only file1 is committed. If you want to add the file2 you can add it to Git and finally commit it.


Thursday, June 1, 2017

Git for Beginners - Part 3 - Initiate the first Git repository


As I mentioned before, Git is like a security guard. Whenever you hand over your files to him, he will keep it with him. So here we are going to exist a new security guard called Git Repository.  I highly recommend you to keep a separate directory to start git repositories.

  • To create a new repository, we use $ git init command. For Linux yours, open up a terminal and change directory to your specific location to start the new repository.                                
         Type $ git init <project folder>. This will make the folder a Git repository.
 

        You will get a message that Empty Git repository is made for the particular location. Then change directory to your Git folder and type ls.  But you cannot see any file inside your repository. OK. now check whether there is a hidden file there. Go ahead and type ls -a.

Now you can see that our security guard,  Git is inside our repository. This a particular feature of Version Control System

Note: 
              If you initiate git on a wrong folder there is way to remove your git folder. If you an Ubuntu user, go to that folder and use shortcut ctrl + H


Windows users: 

You can remove your repository easily but think twice before you remove it. If you really want to remove your repository type $ rm -r repository_name/.git. You will see that your Git folder has vanished from your file. For Linux users use $ sudo rm -r "repository_name"/.git command. You can check weather the Git folder is exist or not by typing ls -a command.


Let's move on. Now it is the time to make our first file and add it our Git repository. I will use nano editor to make our new file and do changes to it in later tutorials.


Well.. we will now add this file1 to our repository by typing $ git add command.

You might wonder why do we want to add files to our repository manually. Consider you have a file of sensitive information such as passwords in your directory and you share this repository to a remote git account and it will be a terrible situation for you. By adding a file to Git repository, it will start inspecting your file.

Note: 
  • If you want to add a particular file to the repository, type $ git add <file_name> 
  • If there are more than one file you can simply add all of those files to your repository by typing $ git add .

After adding files to the repository, we have to commit this file to our repository so Git can track changes in it.


 Go on and type $ git commit <file_name>. But Git doesn't really know who you are. So it won't allow you to commit changes.


So go ahead and type below git configuration commands.

$ git -config --global user.name "name"
git -config --global user.email "email" 

The --global option changes your identity for all your repositories and will be saved with commits. Now you can commit your changes. There is a Good News for you. When you commit changes to your file, you can attach some message that what you have done so far. As an example, we can type something like "My initial commit". 

Note: 
  • If you have changed only one file, you can commit by typing $ git commit -m "your message"
  • If you have changed more than one file, you can commit all of them by typing $ git commit -a -m "your message". The 'm' option is for providing a message right there in a single command and '-a' option tells Git to 'commit ALL' of the changes.

In the next tutorial, I will discuss how to work with Git status and git rm --cached commands.


Copyright © iTecTricks | Powered By Blogger

Design by Shehan Vanderputt